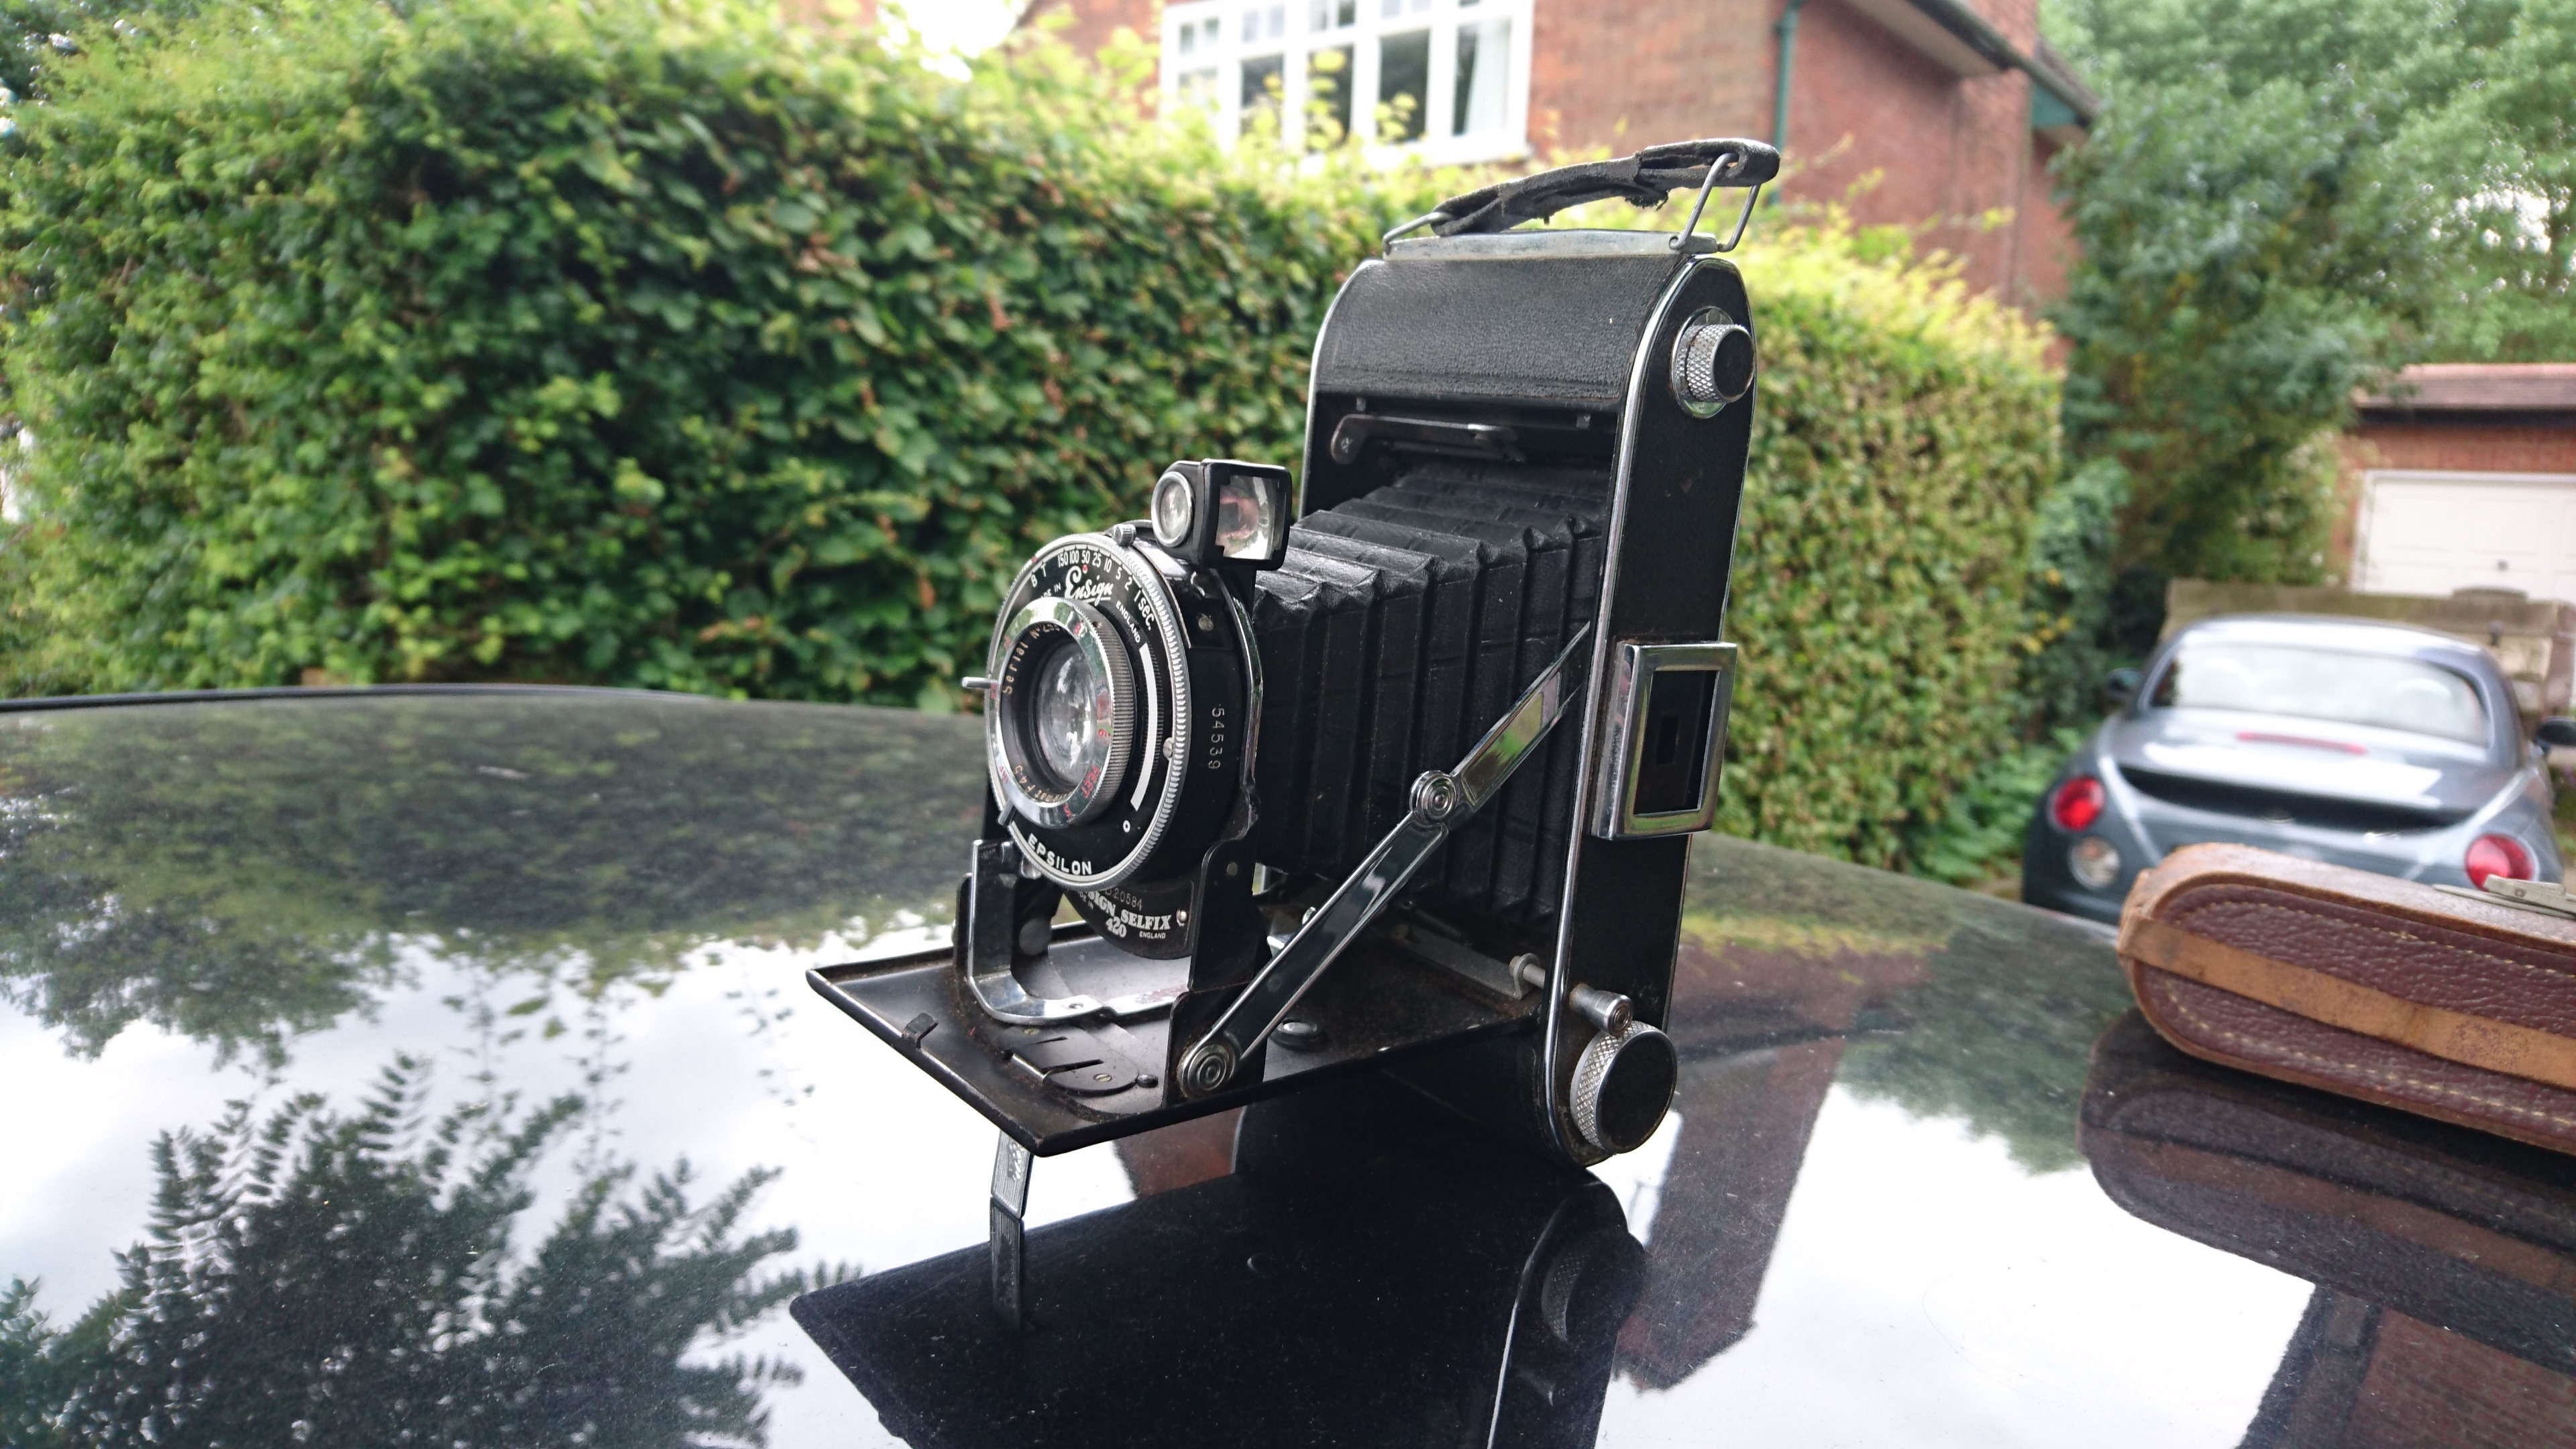
1950's Ensign Selfix 420 Digital Camera
OK, this one is a little odd. I was asking around for any "old stylie" cameras as a friend was looking for an old bellows type camera to use as a theatre prop. Realising my dad had some old cameras I got in touch and found he was looking to "relocate" them as they were just gathering dust in a cupboard drawer. After sending a photo of it to my friend he didn't thing it would be suitable as it wasn't old enough but I still decided to take the camera anyway as it looked kinda retro.
After a little thought and playing around, I realised that a Raspberry Pi Zero would fit inside the camera case. This was the basis for the idea to convert it to be digital. I hear you saying...how does my mind work? Well I can honestly say I don't know:) After confirming with my dad that he would be OK with me "modding" the camera I began work thinking whether the Raspberry Pi camera module would be able to sit in the focus plane using the cameras original optics.
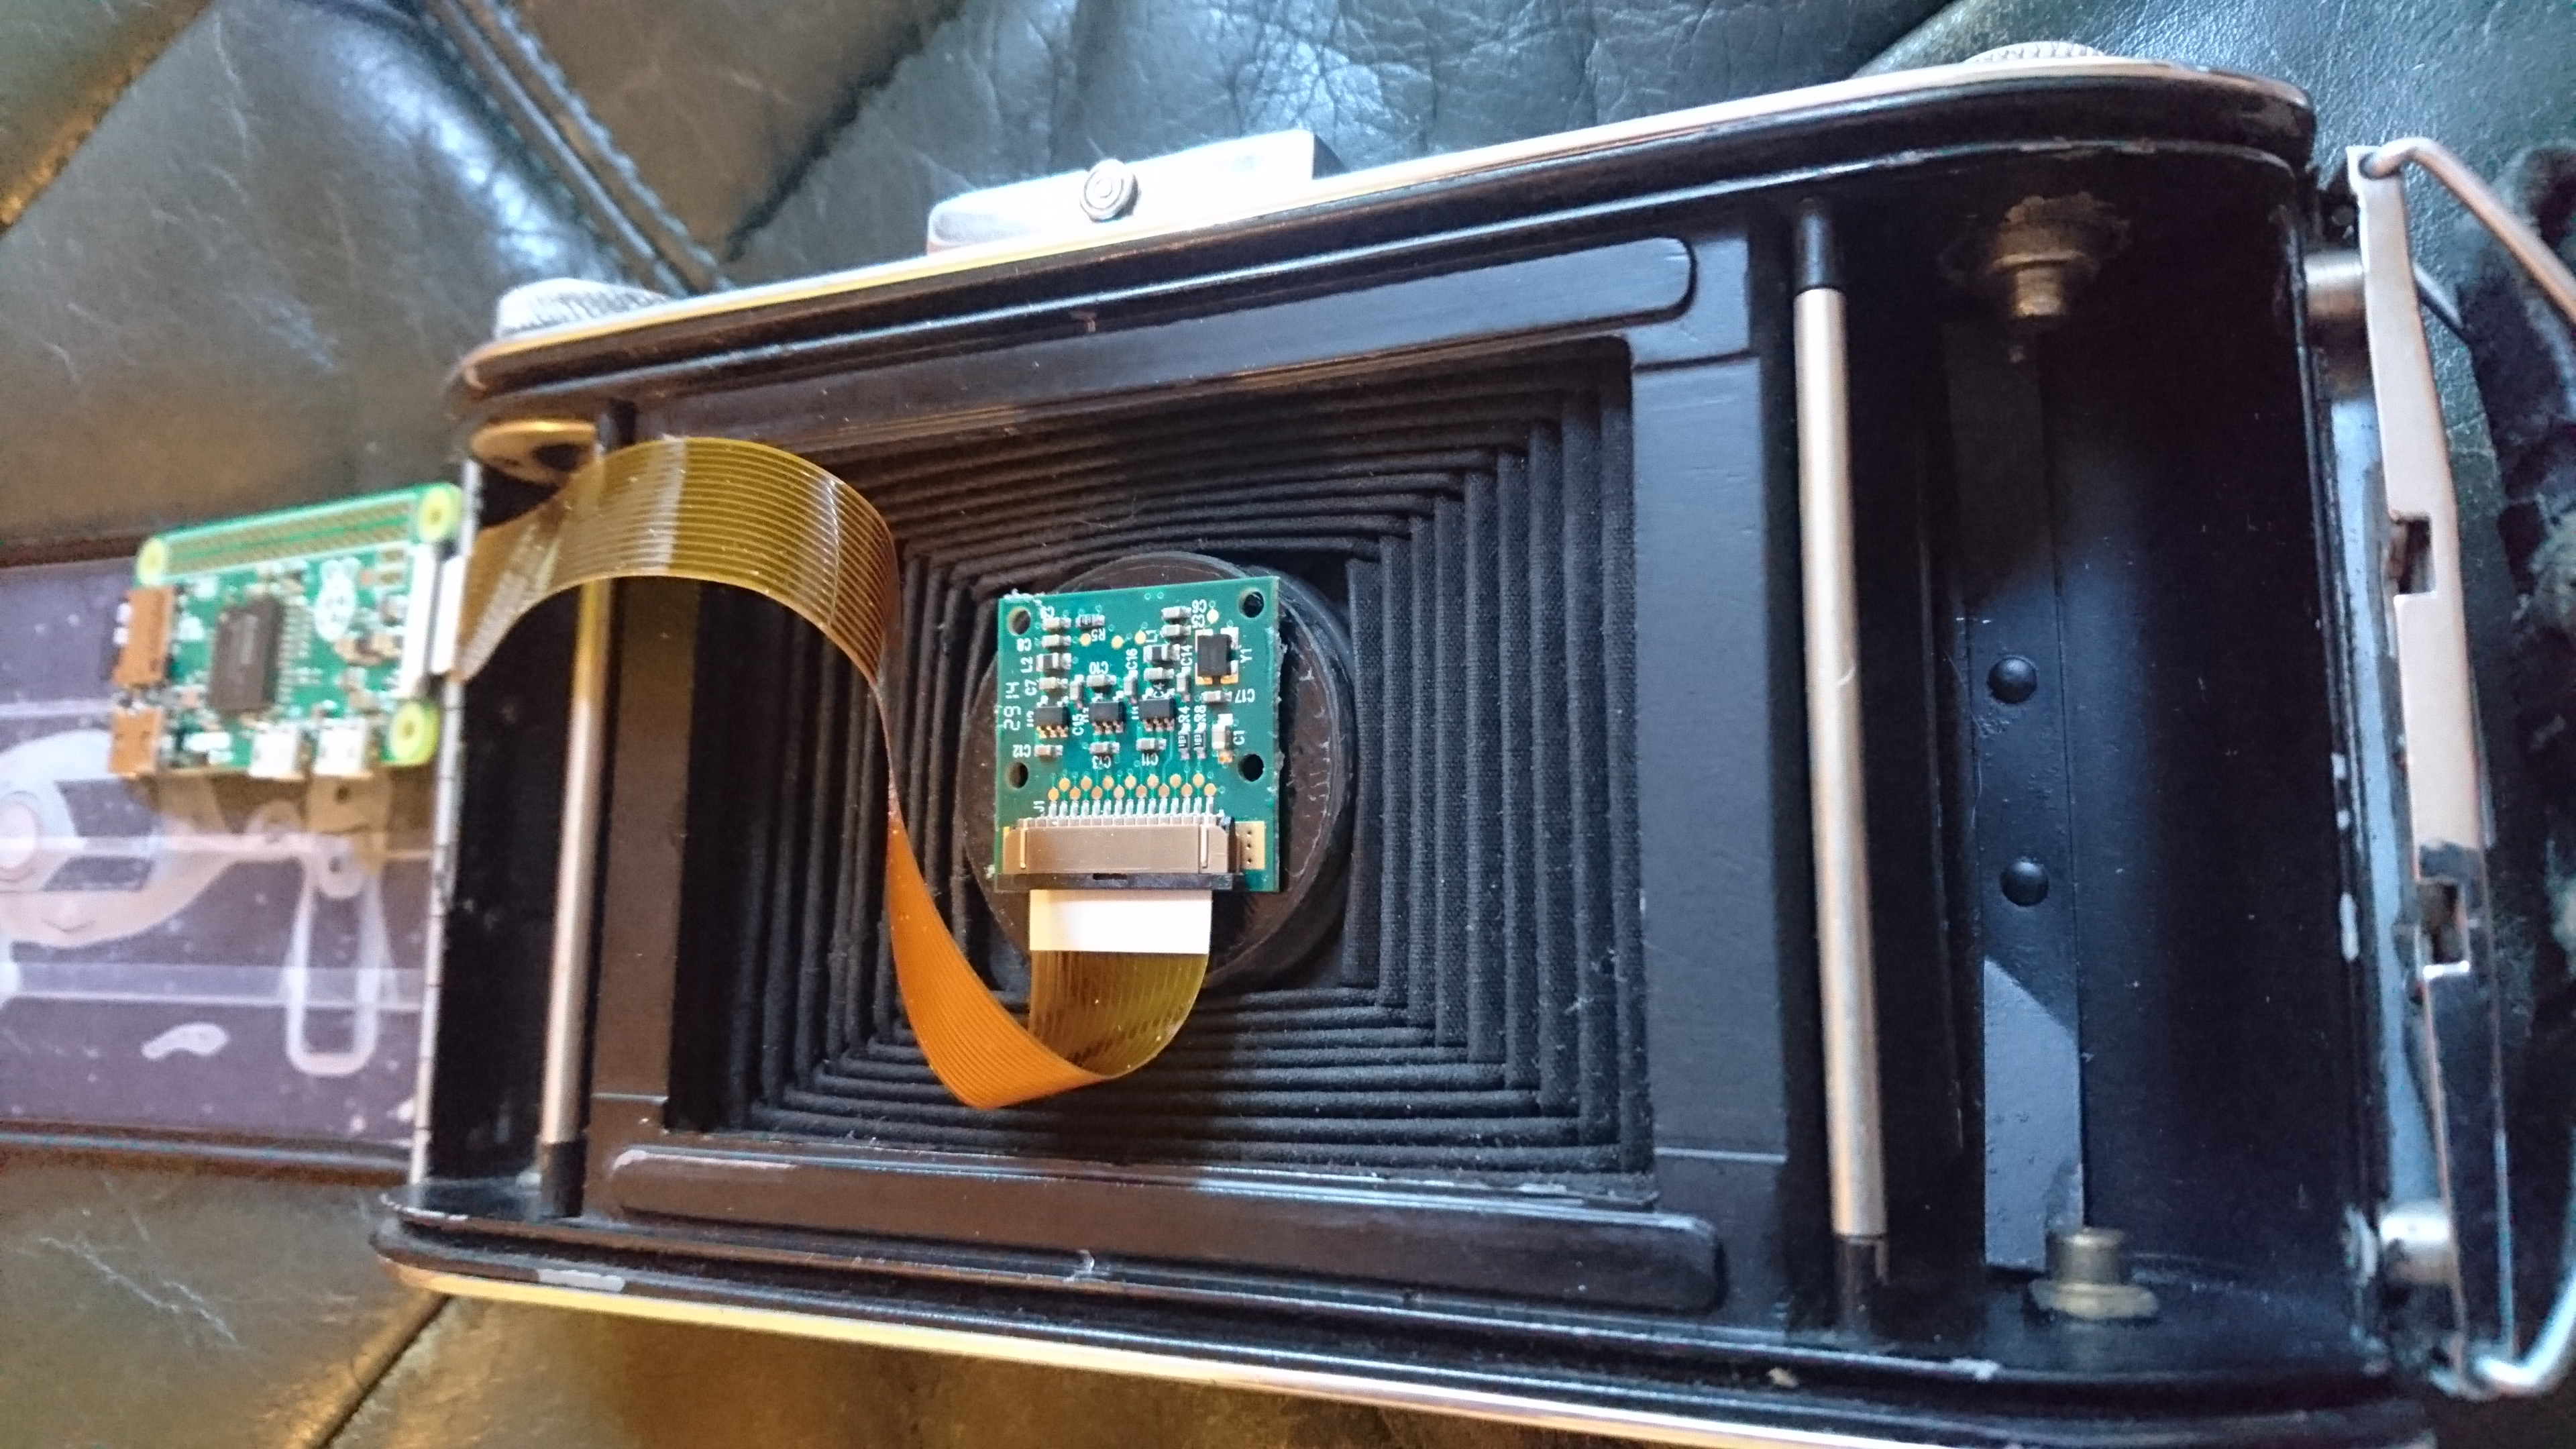
So, first hurdle being the focal plane. To use the camera CCD with no additional lenses it would in effect crop a 70mm frame down to about 3mm. This would mean the final image would be a tiny amount of the actual full frame...not cool. The only other way would be to use the Pi camera's original lens in addition to the retro cameras lens. This has the benefit that the Pi camera can be wedged directly behind the original lens giving more room for the electronics.
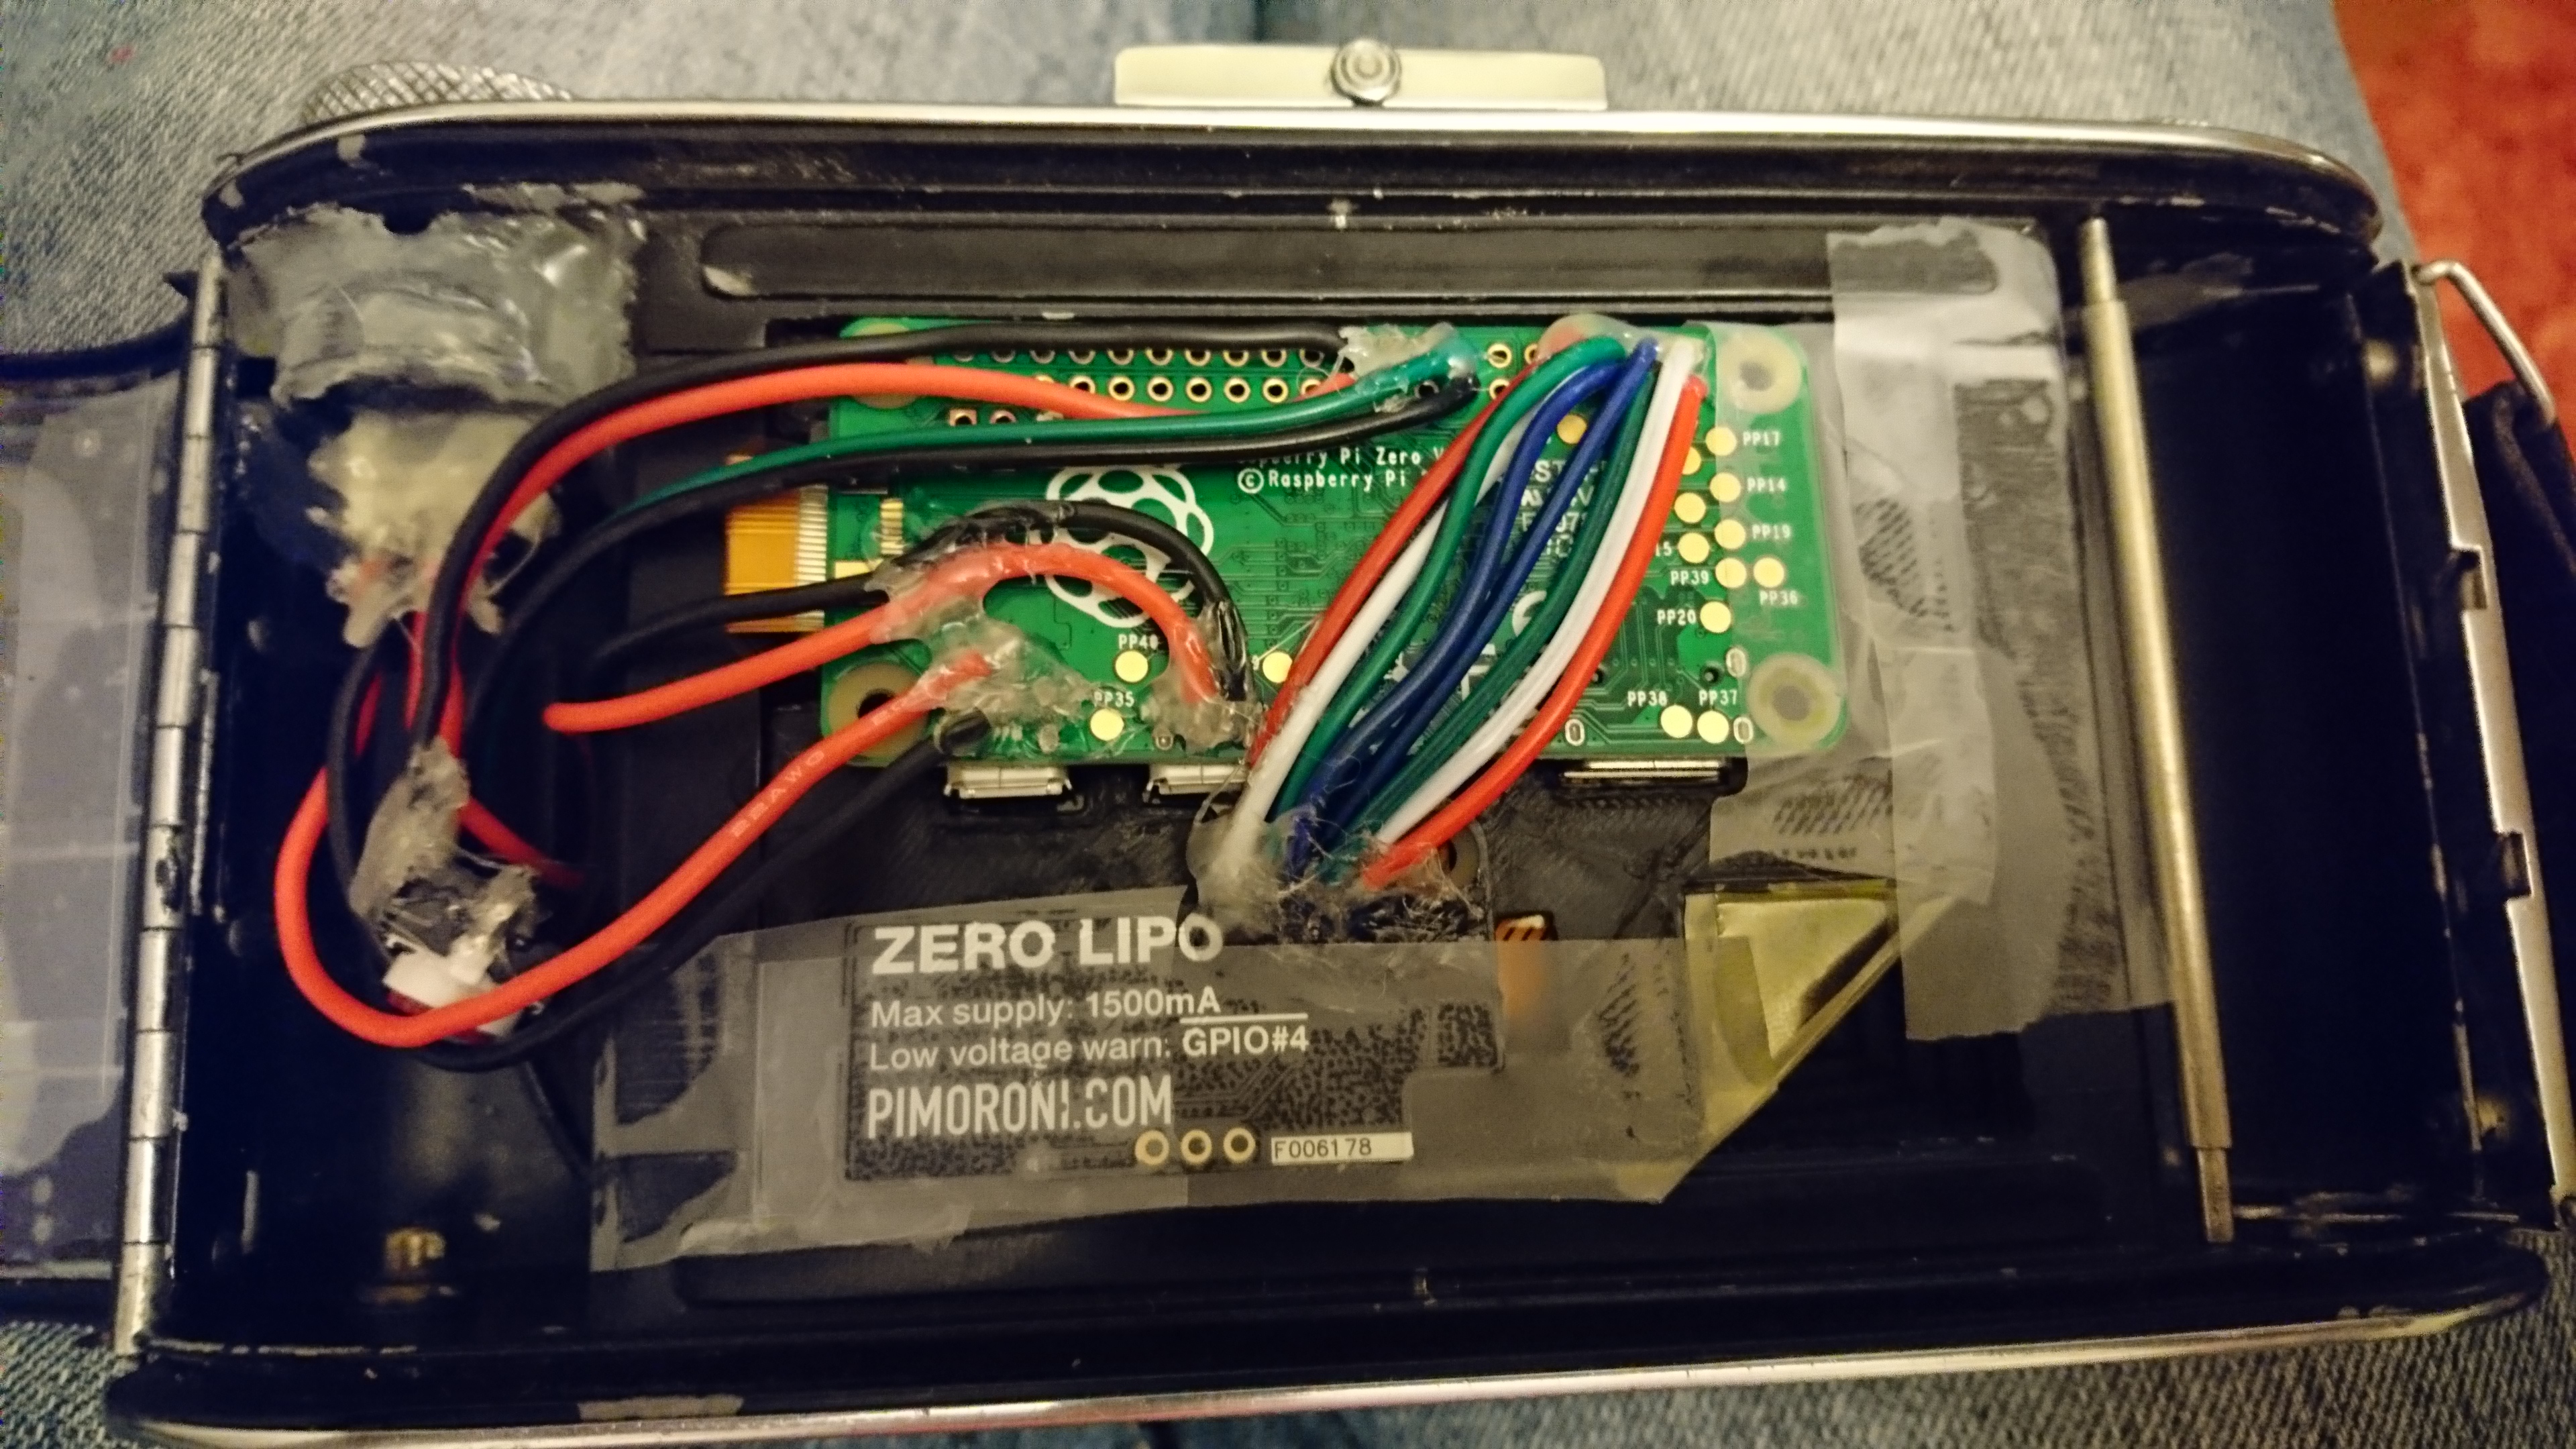
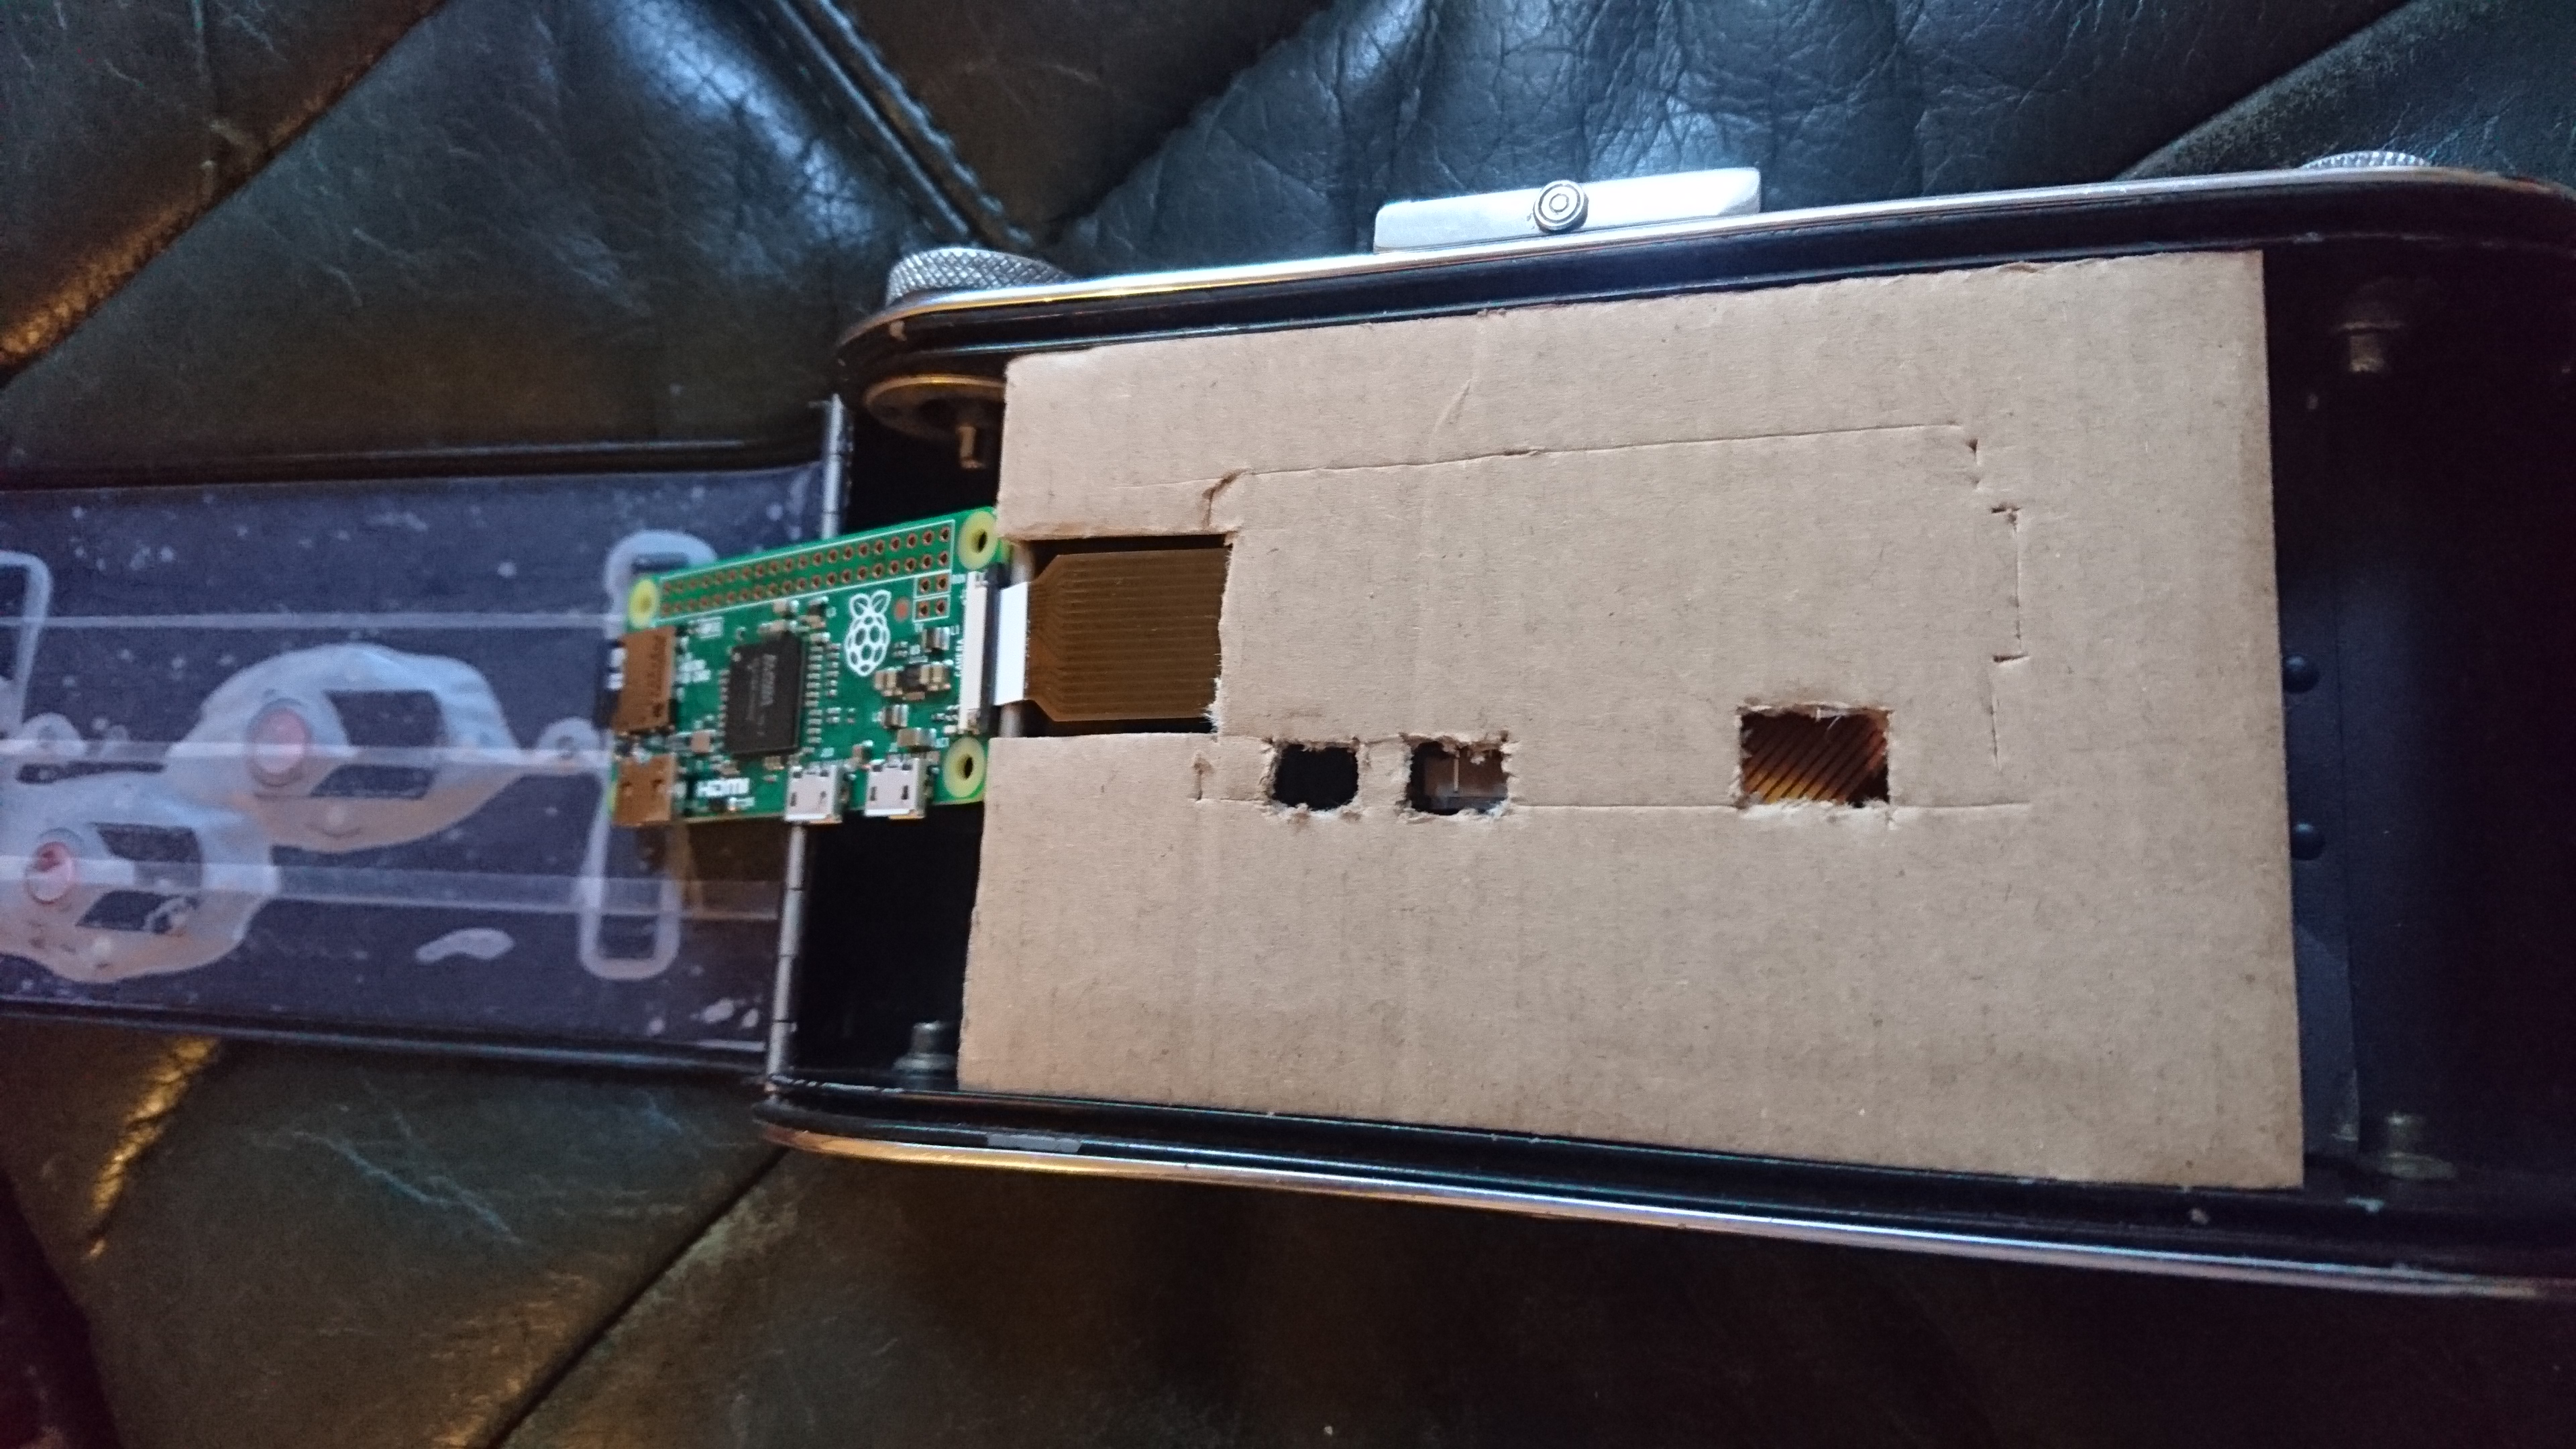
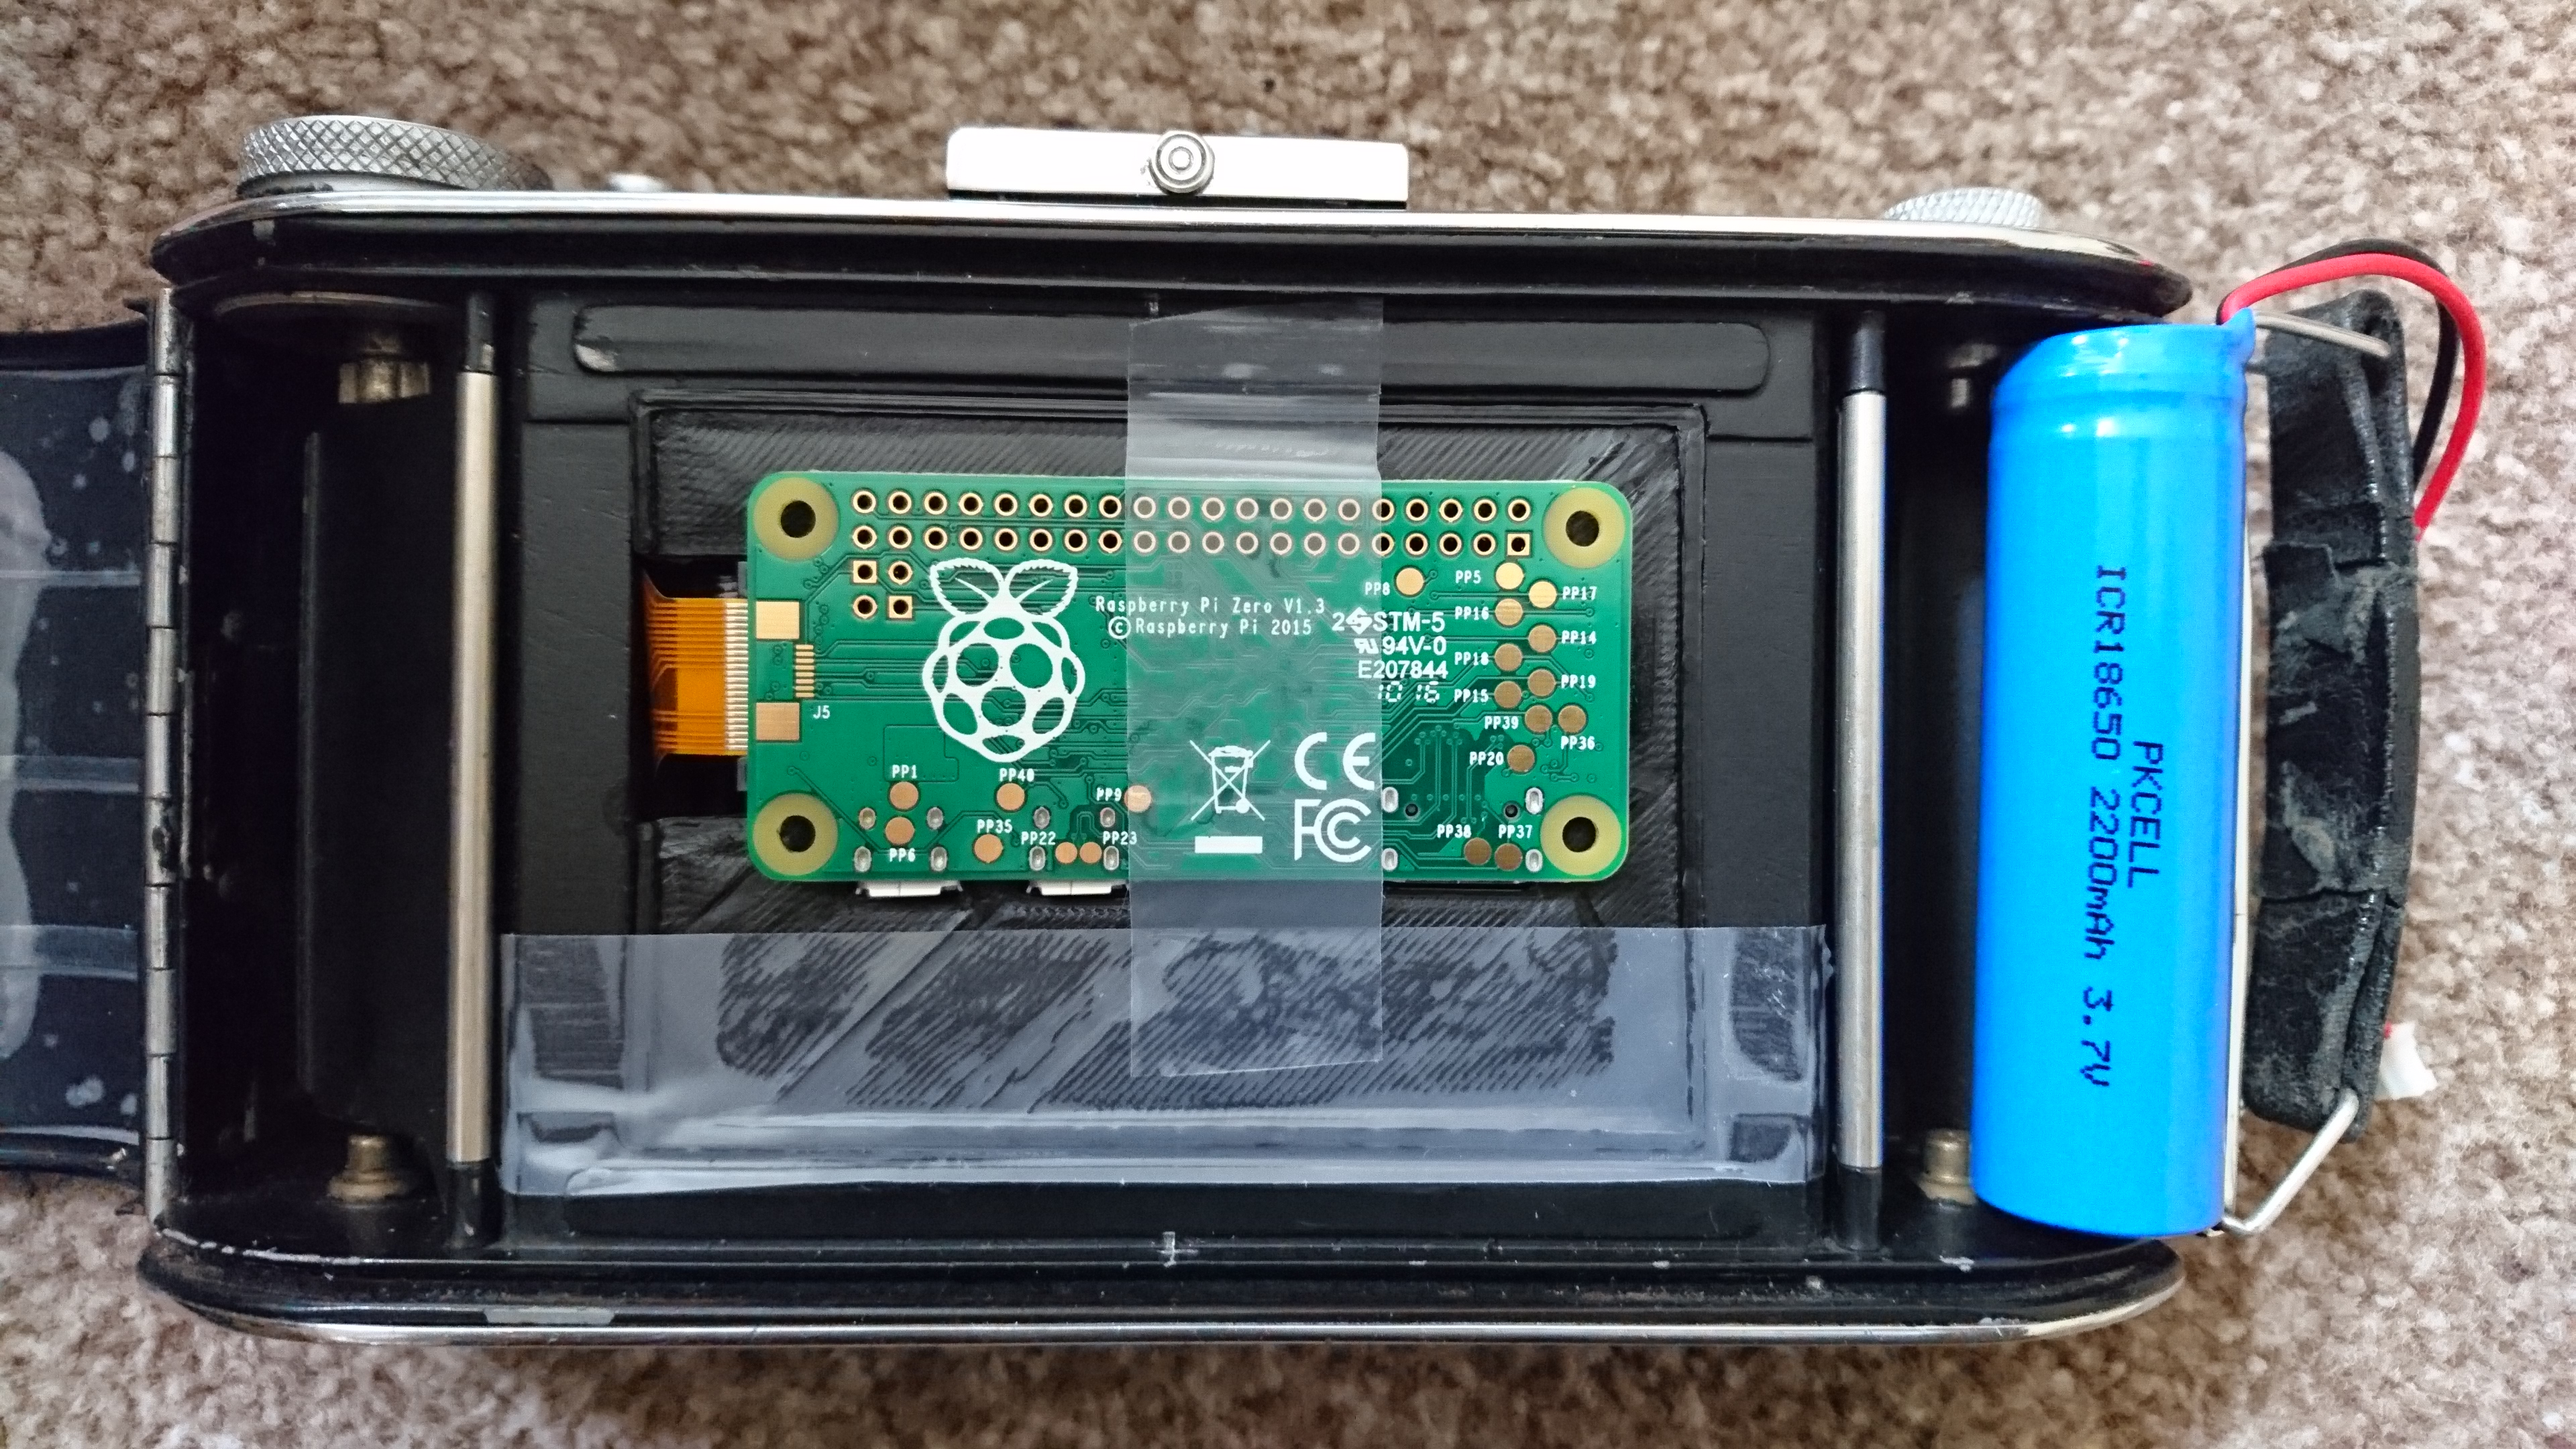
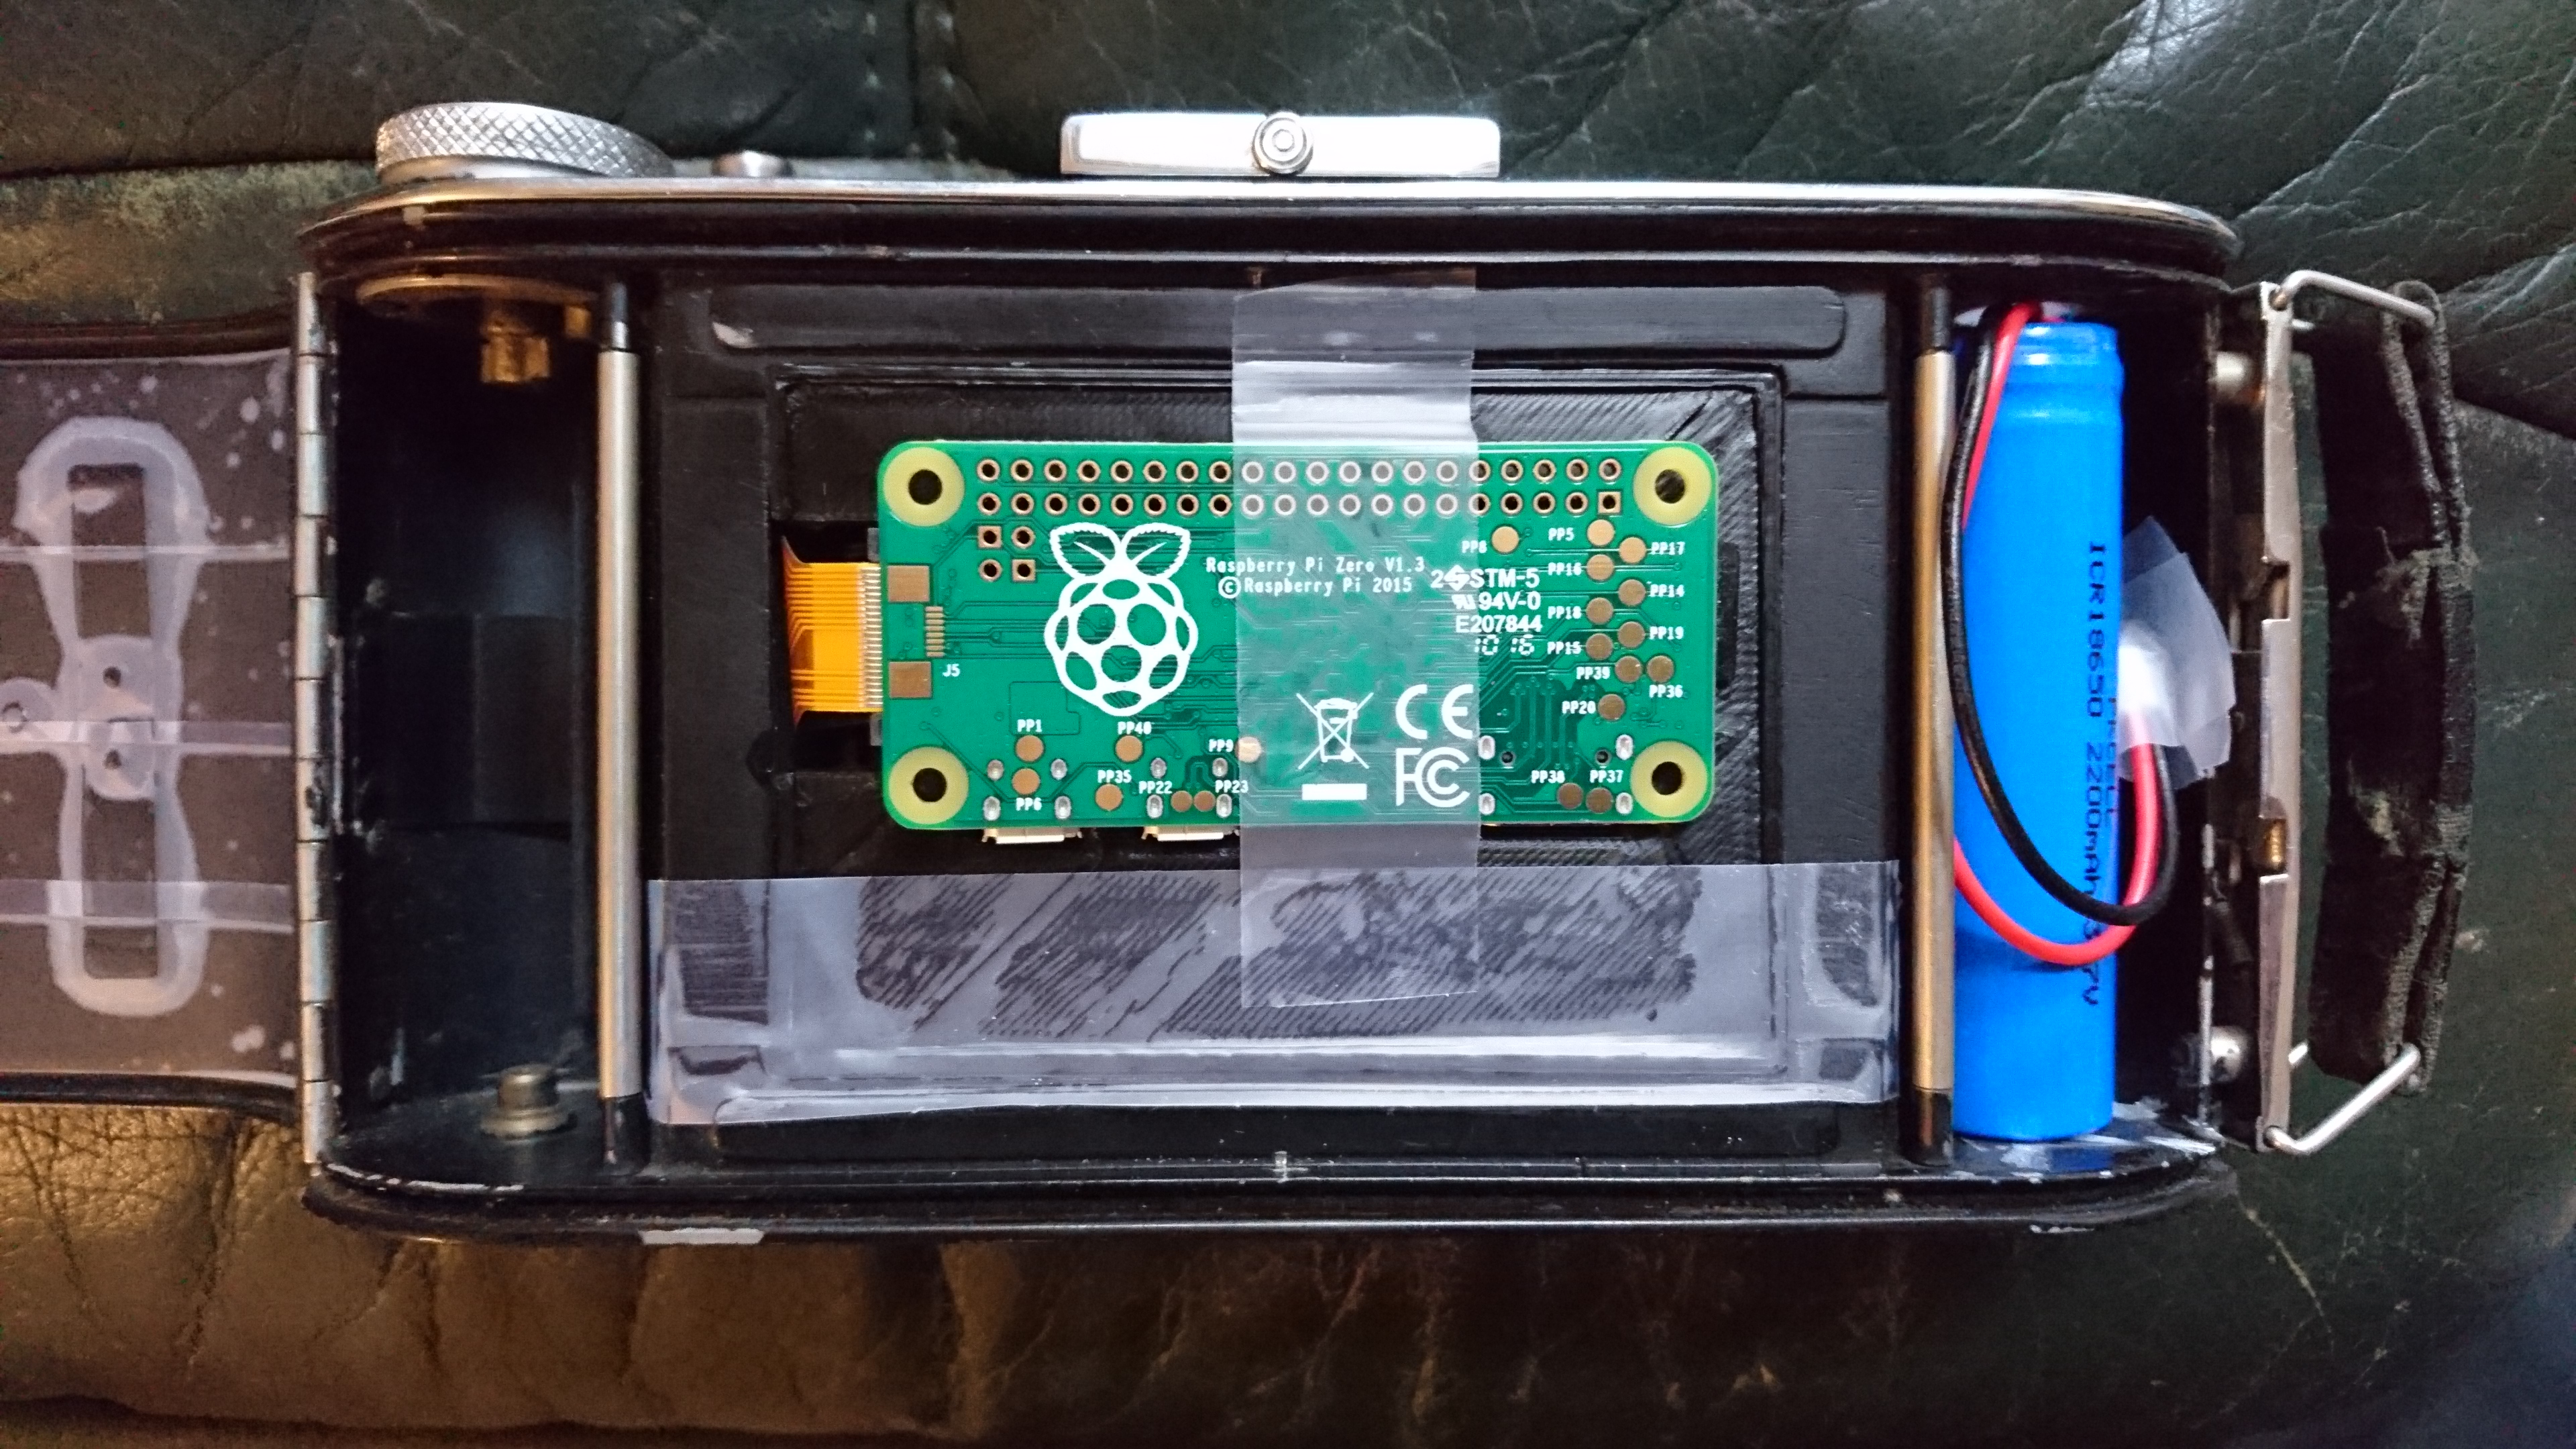
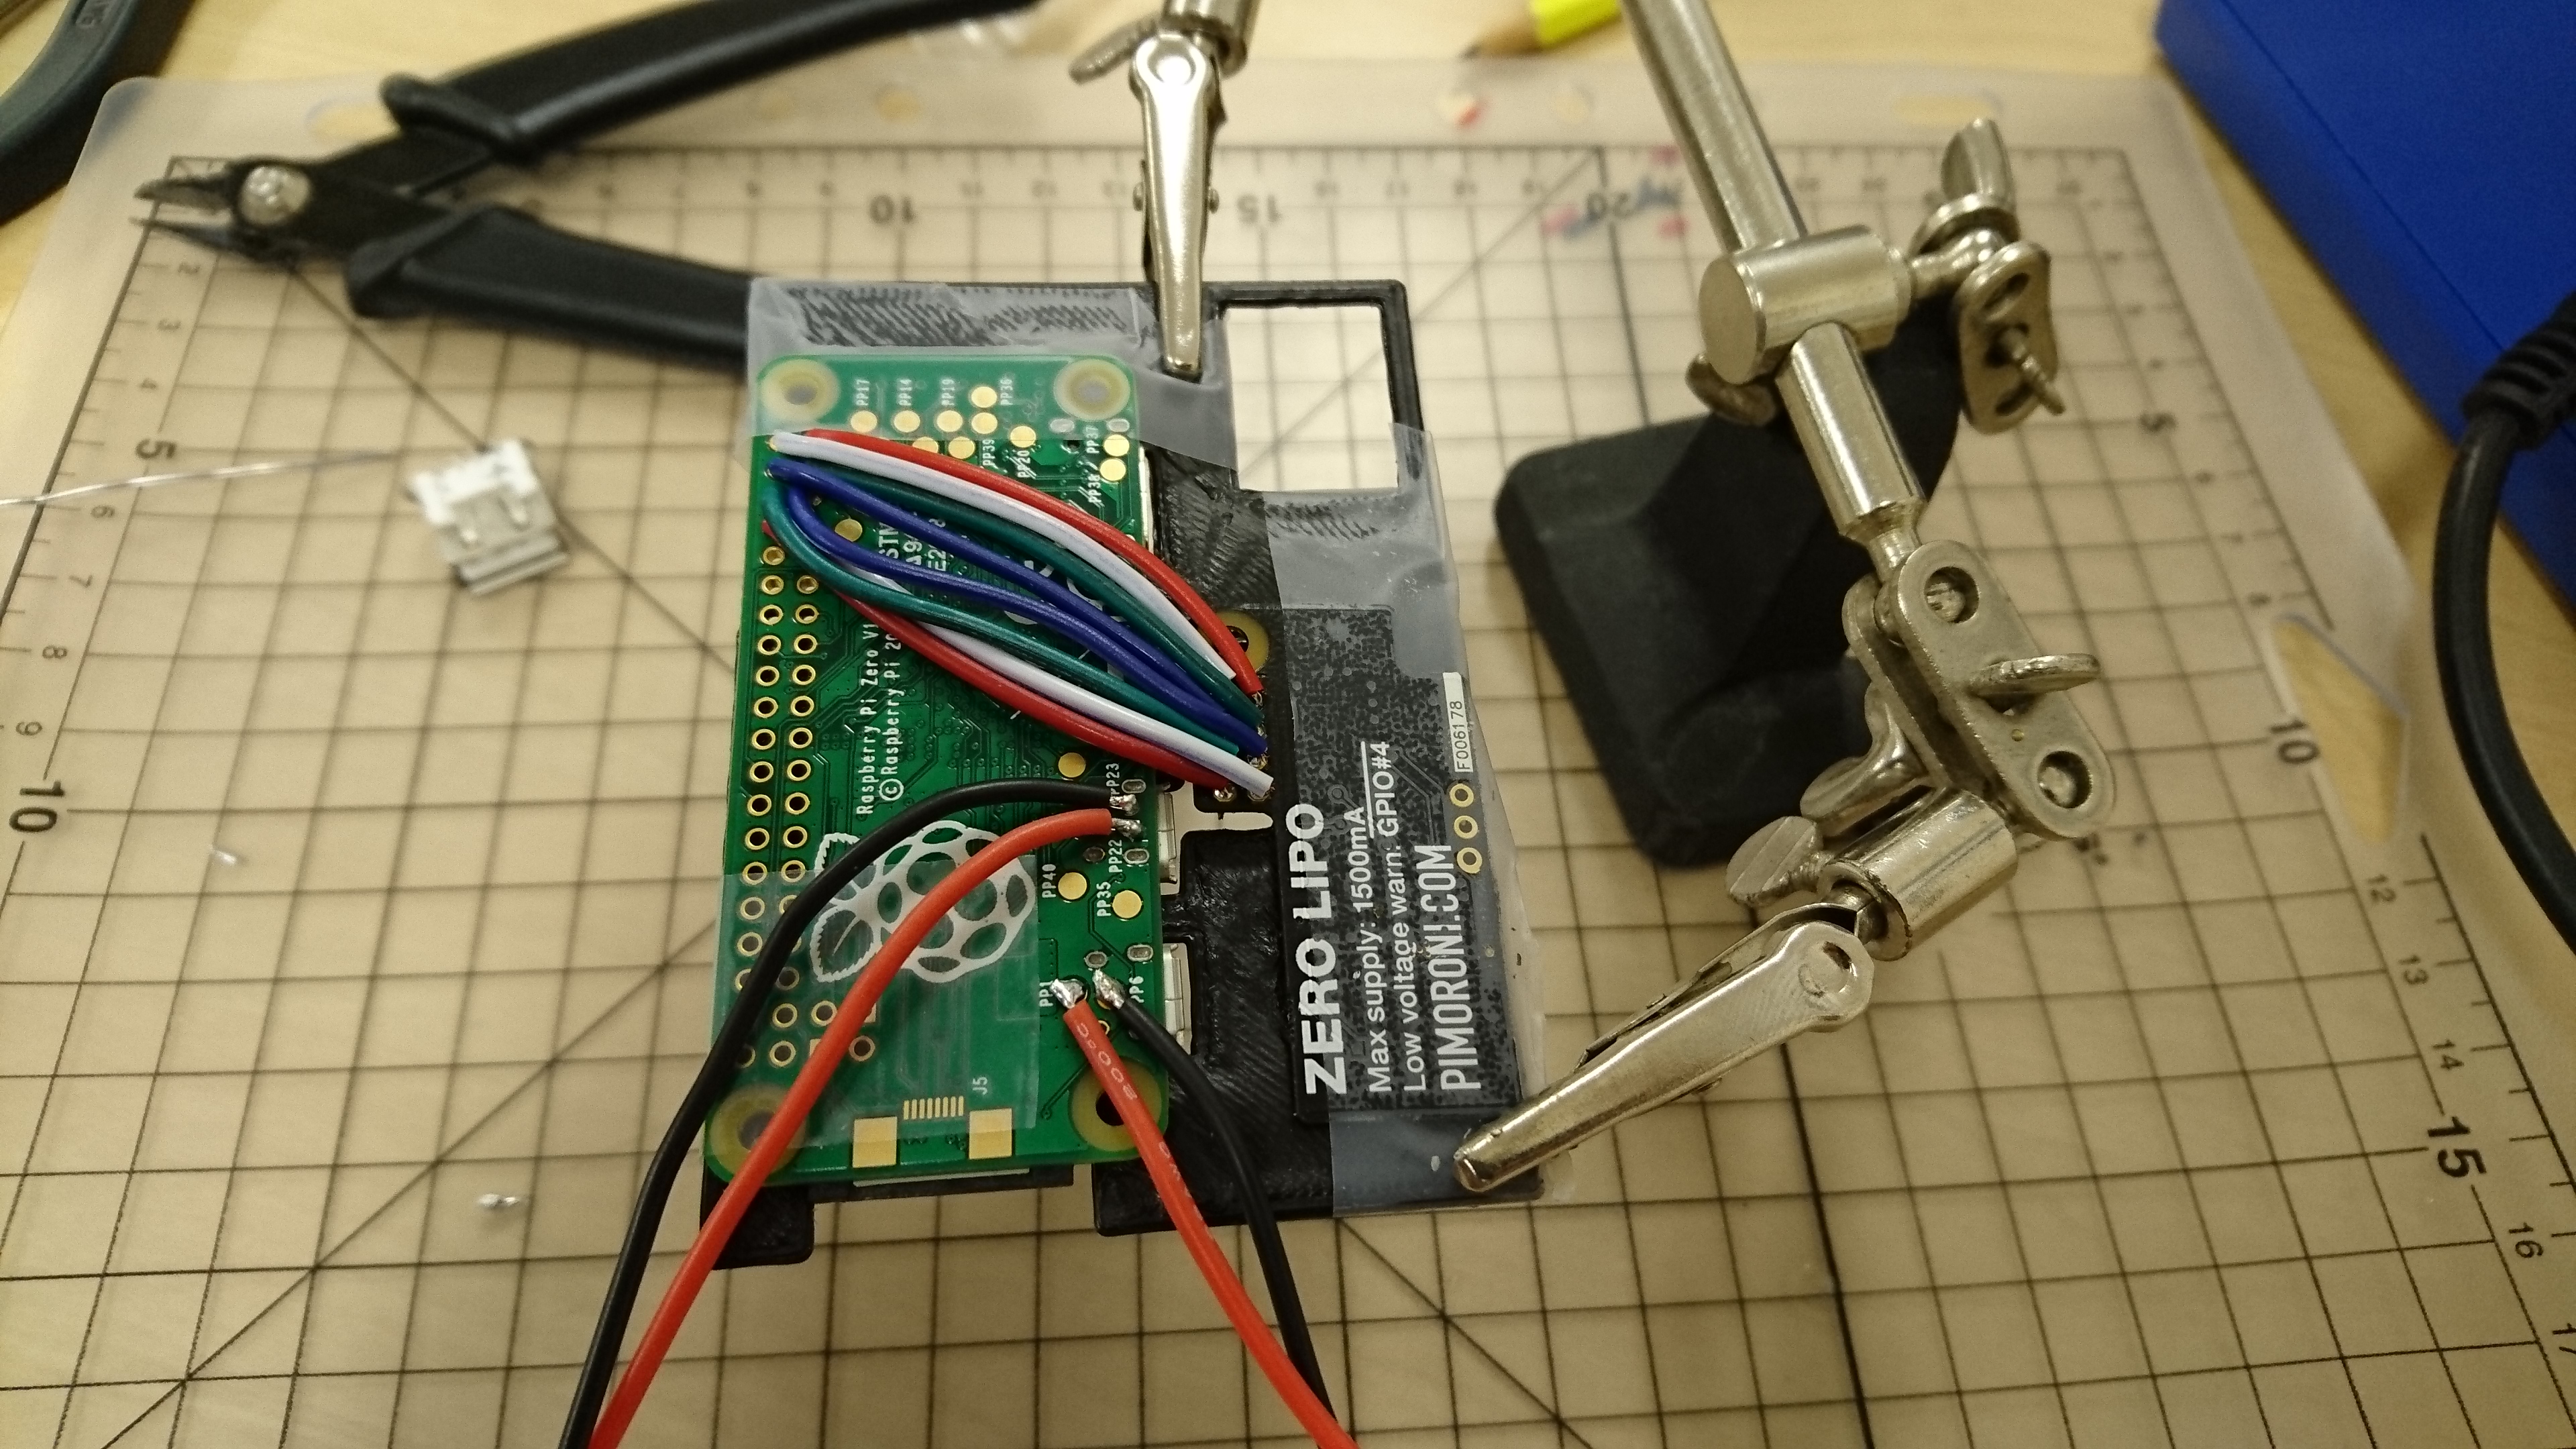
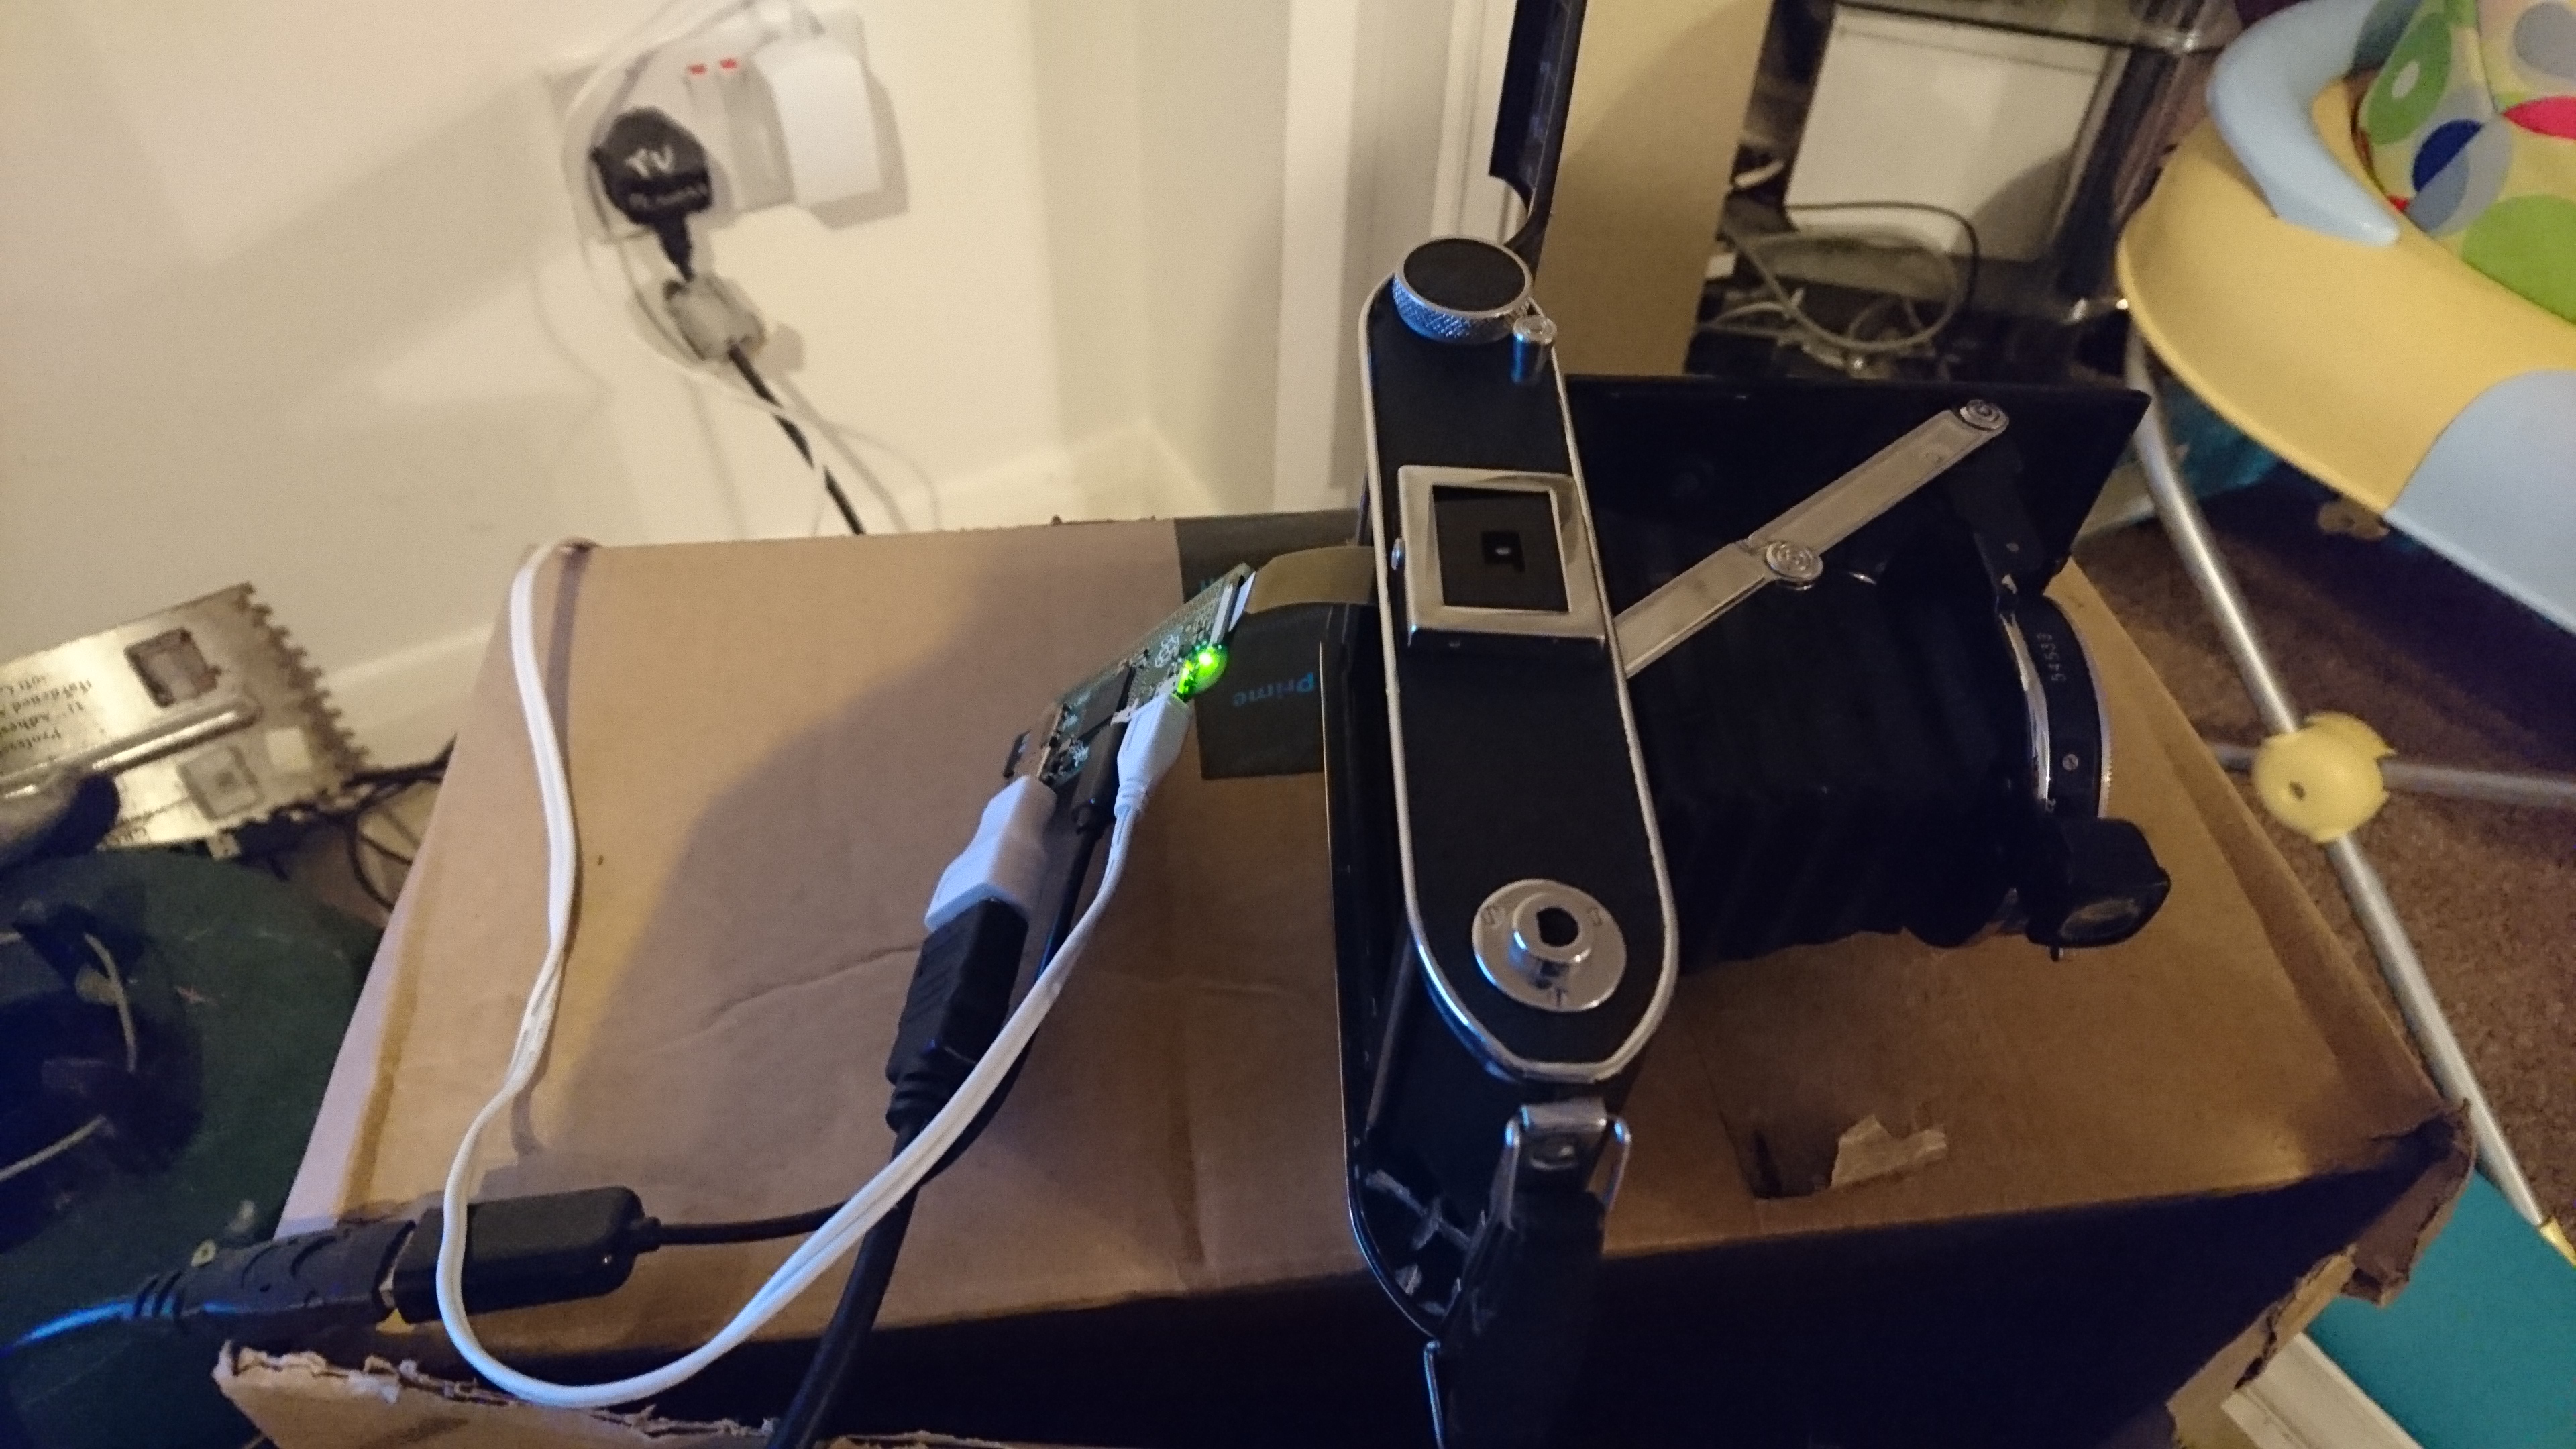
Now I had to decide how to hold the Pi Zero inside the camera. Simplest option was to mount it to a plate that would sit where the film normally would. I knocked up a prototype plate with cardboard and a craft knife. This meant I could easily test positioning the Pi Zero. Once finalised, this could be replicated in CAD and 3D printed for best strength vs material thickness. Once printed, I could wire up the battery controller to the Pi Zero and directly solder a female USB connector to the test pins on the back as there would be no room to use the micro USB connectors. The USB would be used as either a direct USB mass media storage option or my favourite option would be to plug in a wifi dongle and have the retro camera wifi enabled. In the future it could automatically upload photos to instagram or a dropbox / google drive.
After a little research, the 18650 2200mAH LiIon sold by Piromoni fits almost perfectly where the roll of film would normally sit in the retro camera. I did have to "adjust" the camera frame slightly by removing the small axle stub at the bottom and the sprung loaded mechanism at the top. I won't lie, the battery was actually more luck than judgement as I thought it looked like it might fit and bought it anyway.
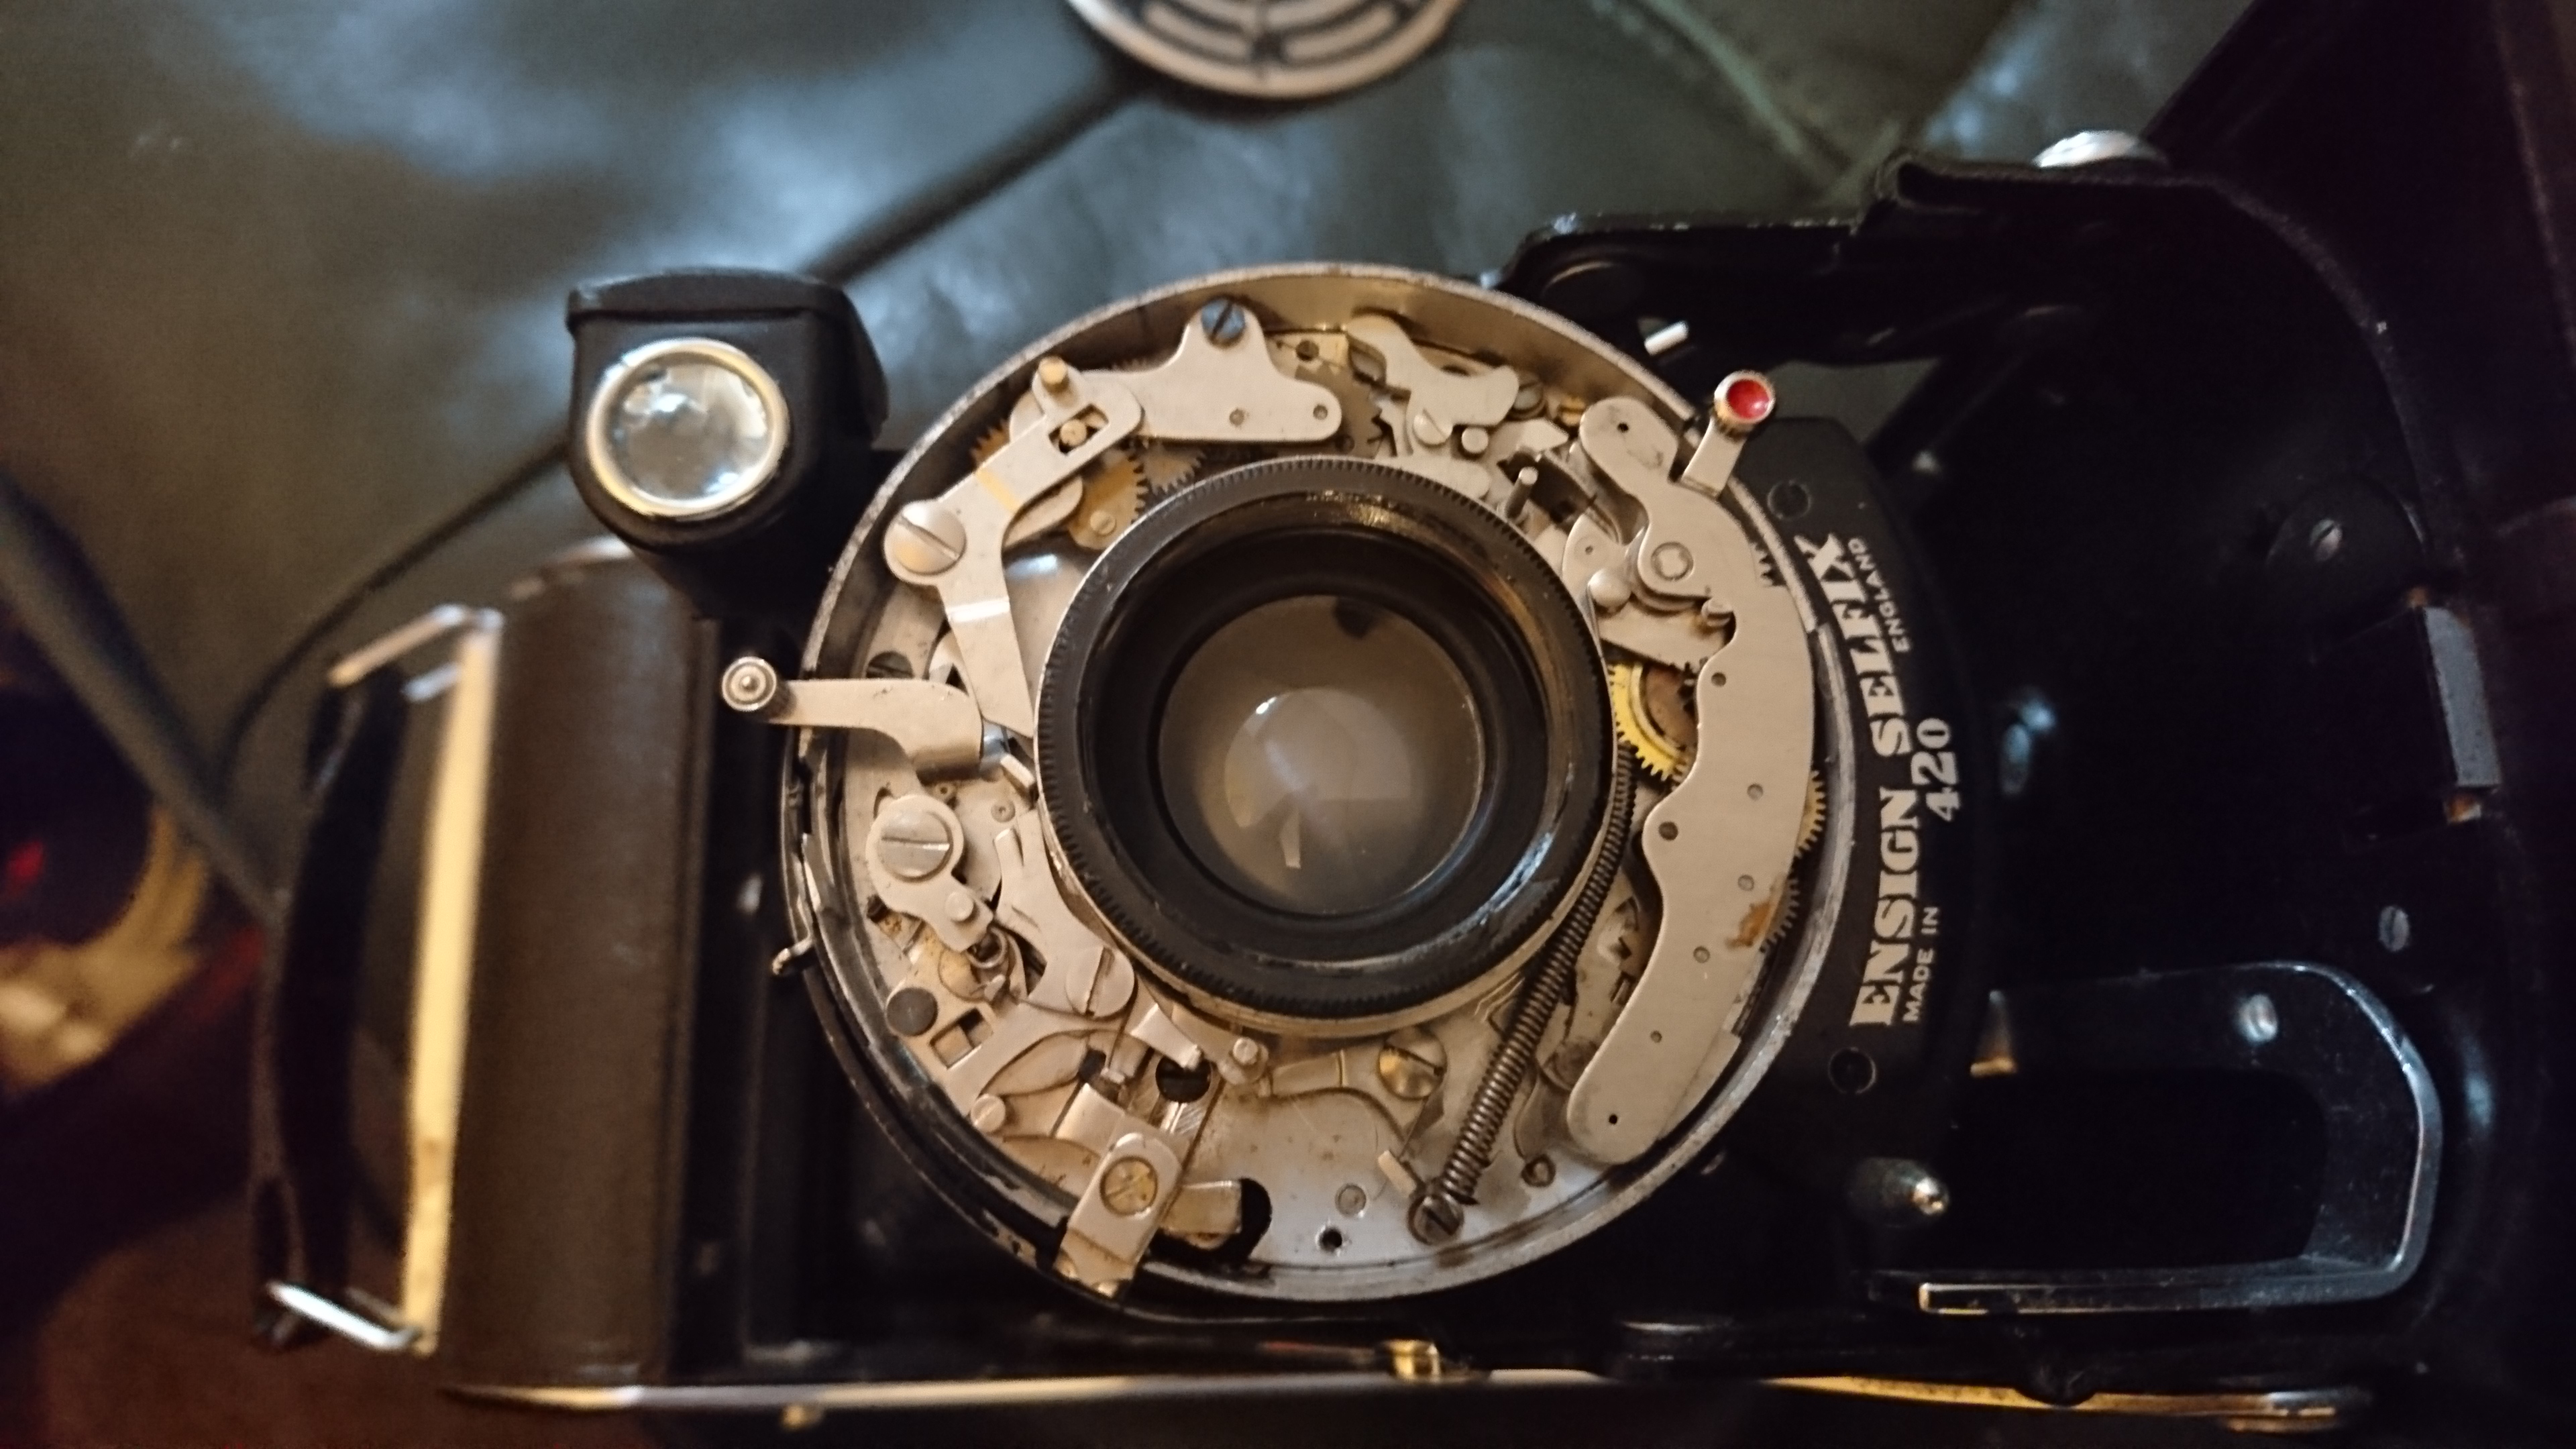
One of the trickiest problems was how to connect the Pi Zero to the original shutter release mechanism. Due to the beautiful folding bellows, the mechanical button on top actually pushes a series of pivoting levers which then push the shutter release lever mounted on the lens ring. To avoid interfering with the folding bellows and to keep the original aesthetics I couldn't put wires on the outside. I was (and still to be honest) thinking of running wires on the inside of the bellows to the actual clockwork shutter release mechanism. I even bought a second Ensign Selfix 420 on eBay so that I could safely dismantle the clockwork mechanism without fear of ruining the working camera. Unfortunately, even though the clockwork mechanism is beautiful, it was just too fiddly to fit a microswitch inside. Especially with the iris shutters getting in the way.
After all the hardware was assembled, next thing was to create a simple python program to take a photo when ever a button was pressed. Sounds simple...and was, apart from the issue of shutter timing. Obviously the Pi Zero camera has to take a photo just after the shutters open. The issue is the Auto Exposure setting on the Pi Zero Camera. It takes about 1 - 1.5 seconds for the camera to correctly expose after being in complete black. Until I work out a way to reliably calculate the light level outside and pre-set the Pi Zero's exposure settings I have simply put in a delay and use the "T" setting on the original camera which keeps the shutter open until you press the release a second time.
A fun project and keeps the camera useful rather than rotting away in a cupboard drawer.